
One of the advantages of watching Masterchef is that Jack will occasionally see a recipe that he wants to have a go at making. One of the disadvantages is that they are usually Adriano Zumbo creations that involve acetate and titanium dioxide and a degree in chemical engineering. His recipes have reduced grown men to tears. Level of difficulty? Off the charts.
So you probably heard my heart thud into the pit of my stomach when I asked Jack what kind of birthday cake he wanted this year and he replied "Liliana from Masterchef's Rainbow Cake."
Now I haven't been watching Masterchef religiously this year so I had no idea what cake he was referring to and had to look it up online. You can imagine how utterly thrilled I was to discover that Liliana was eliminated from the show for making this Rainbow Cake because it was TOO SIMPLE for Masterchef. "Not a Masterchef dish" said the judges. Music to my ears.
So here you go. Jack's birthday cake, aka Liliana's Rainbow Cake, aka The Elimination Cake!
You can find Liliana's recipe here, however when I read that it took 6 hours to make, I decided to go to my own fall-back cake recipe - a mix-and-melt cake batter that has been handed down to all the women in my family from my great-grandmother. Each quantity makes 2 cakes so the whole thing only took me 2.5 hours, including cooling time and decorating.
Grandma Dillon's Mix-n-Melt Cake
(You will need 2 quantities to make 4 cakes)
2 ¼ cups SR flour
1 ½ cups castor sugar
2 eggs
1 cup milk
1 ½ cups castor sugar
2 eggs
1 cup milk
1 teaspn vanilla extract
125g butter, melted
Colours - blue, green (mix blue and yellow), red, orange (mix red and yellow)
Mix all ingredients and beat well. Divide evenly into two bowls and add enough colouring to make the colour really vibrant. Add a little more. Go on.
Spoon mixtures into 2 tins lined with baking paper and cook in oven at 180C for approx 25 mins. Skewer should come out clean when cooked.
 |
| Radioactive Green & Sizzling Hot Pink ready to go in the oven |
 |
| Blue and orange seem positively sedate compared to red and green! |
Butter Frosting
500g butter
6 cups icing sugar
1/2 cup milk
2 tspn vanilla extract
Beat all ingredients well until thick.
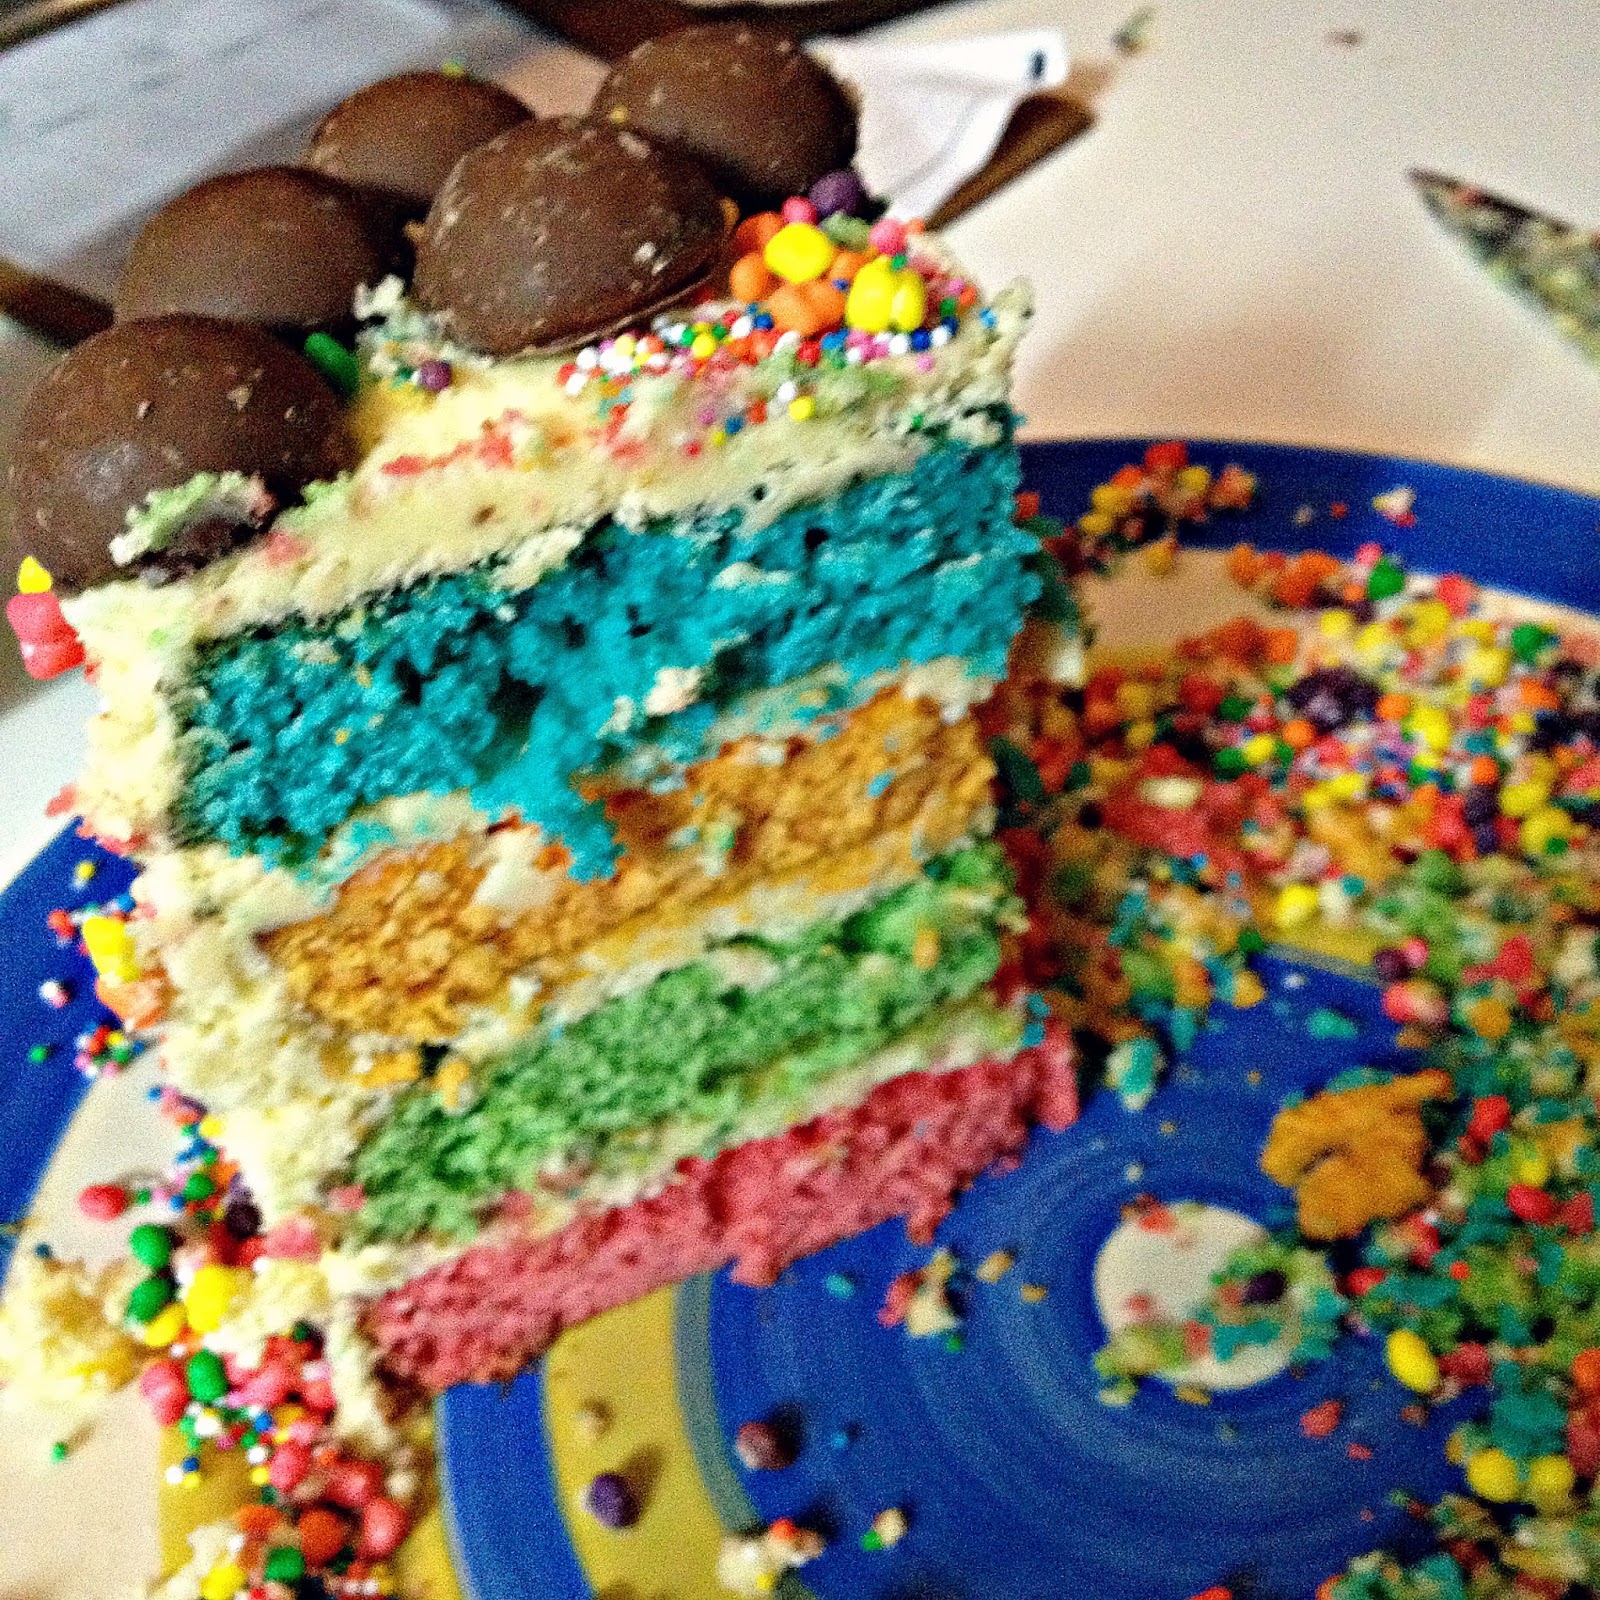
When cakes are cooled, use a long, sharp bread knife to slice the rounded top from each cake so that the top of the cakes is now flat. (Be prepared to be dazzled by the vibrant colour of your cake inside!) This will make layering easier and your cake is less likely to look like the Leaning Tower of Pisa.
Sandwich each cake layer between slatherings of butter frosting, then once the cake is assembled, use a spatula to smooth frosting onto the top and sides of the cake until it is completely covered.
In a bowl, mix up any kind of sweets you like to decorate the sides. We used Nerds and sprinkles, but you could include anything you find in the cake decorating department of the supermarket! Mini M&Ms could work well too. We literally grabbed handfuls and sort of pressed them into the side of the cake. I won't lie, it was messy but fun! Instead of piping frosting onto the top of the cake, we used chocolate covered marshmallows.


The cake was a huge hit with the kids at Jack's party. There was a big "ooh-aah" factor when it came out. But it is sweeeeet!! My tooth fillings rattled as I raised a spoonful of cake to my lips.
Enjoy!
 |
| A big knife for a big cake! |
No comments:
Post a Comment
I love hearing from you (and by the way, you're looking lovely today) x